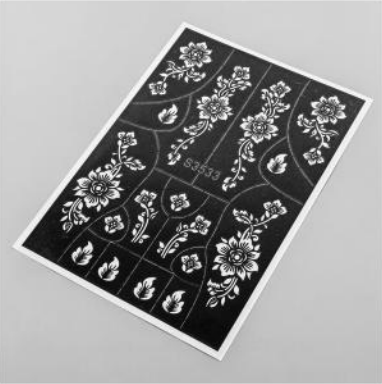
#13 Stencil
#13 Stencil
- Regular price
- $8.00 SGD
- Regular price
-
$10.00 SGD - Sale price
- $8.00 SGD
- Unit price
- per
Sold Out
Using pre-cut henna stencils can make your henna application faster and easier, especially if you're new to henna or want precise designs. Here's a step-by-step guide for using pre-cut henna stencils:
Materials Needed:
- Pre-cut henna stencil(s)
- Fresh henna cone
- Small spatula or applicator tool (optional)
- Baby wipes or damp cloth for cleaning up
- Aftercare oil or balm (optional)
Instructions:
-
Prepare Your Skin:
- Clean and dry the area where you’ll be applying the henna. Make sure there's no oil, lotion, or makeup, as it can prevent the henna from adhering well.
-
Position the Stencil:
- Gently peel the backing off the pre-cut stencil.
- Place the stencil on the skin where you want the design. Press it down firmly to make sure there’s no gap between the skin and stencil.
- Remove the clear transparent sheet
-
Apply Henna Paste:
- Remove the pin from the tip. Squeeze the henna gently to fill in the design on the stencil. Be sure to cover all the openings in the stencil.
- If you're using a spatula or applicator, spread the henna over the stencil.
- Apply enough henna to ensure the design is solid and full.
-
Let It Set:
- Let the henna paste dry for 10-20 minutes. The paste should be slightly tacky to the touch, but not too wet. Do not move or touch the stencil during this time to avoid smudging.
-
Allow the Henna to Dry:
-
- Let the henna design abosorb completely on the skin. It can take anywhere from 2-3 hours for the henna to absorb.
-
-
Remove the Stencil:
- Once the paste is set, carefully peel off the stencil. Start from one corner and slowly lift it away from the skin.
- Once the paste is set, carefully peel off the stencil. Start from one corner and slowly lift it away from the skin.
-
Aftercare:
- Once the henna is dry and removed, avoid washing the area for at least 12-24 hours for the best stain. Applying aftercare oil or balm can help moisturize the design and prolong its wear.
Tips:
- Test the Stencil: If you're using a stencil for the first time, test it on a small area first to ensure you like the design and that it applies easily.
- Henna Quality: Always use fresh henna paste for the best color result.
- Avoid Water: Keep the design dry for as long as possible to ensure the best stain.
That's it! With practice, you’ll be able to apply these pre-cut henna stencils quickly and beautifully.
Couldn't load pickup availability
